
Why do you need the backup driver(s) on your Windows OS?
As we have seen which drivers you need to install on a new pc, it’s also essential that you have all your drivers stored in one place in case of a system crash, disk failure, etc. If you have decided to reinstall Windows, you have to go through the complete installation of all the drivers again, which can be tedious and a waste of valuable time.
As we know, Windows 10 has a lot of generic drivers that will serve until you download the appropriate drivers for all your essential components. What if Windows doesn’t have the correct driver for your network card, and you can’t access the Internet?
Some util programs can automatically backup all the drivers on your Windows, but I’ll show you the manual mode without paying for utilities. So, the point is that all drivers are neatly stored in a safe place before you start reinstalling the operating system. In this way, you will quickly return all the drivers to their location and ensure the regular operation of all hardware components.
Table of Contents
Windows 10 Driver(s) Backup
For the backup operation of your drivers, we will start from the command prompt window in Windows OS (10).
1. The first step is to determine a reliable location to store the driver. This location can be another partition on the primary drive or another external drive, DVD, or USB flash drive. So, create a new Drivers folder on that partition that isn’t the primary disk.

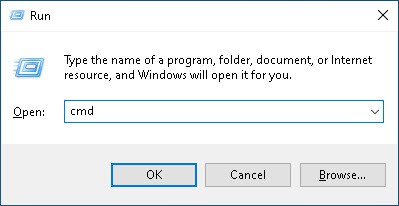
2. The second step is to open the Run box. Press Windows+R. Then, type cmd into the box and press Ctrl+Shift+Enter to run the command as an administrator.
3. You started the command prompt with administrator privileges. The word Administrator also shows it (appears in front of the name of the command prompt window).

4. For the needs of driver backup, we will use the service tool DISM (Deployment Image Servicing and Management). First, you must manually create a folder on disk because DISM can’t automatically create a folder. Failure to first create a folder will only result in an error message.
So suppose you created a folder on disk H and named it Drivers. At the command prompt, type the following command: dism /online /export-driver /destination:H:\Drivers, and press Enter.

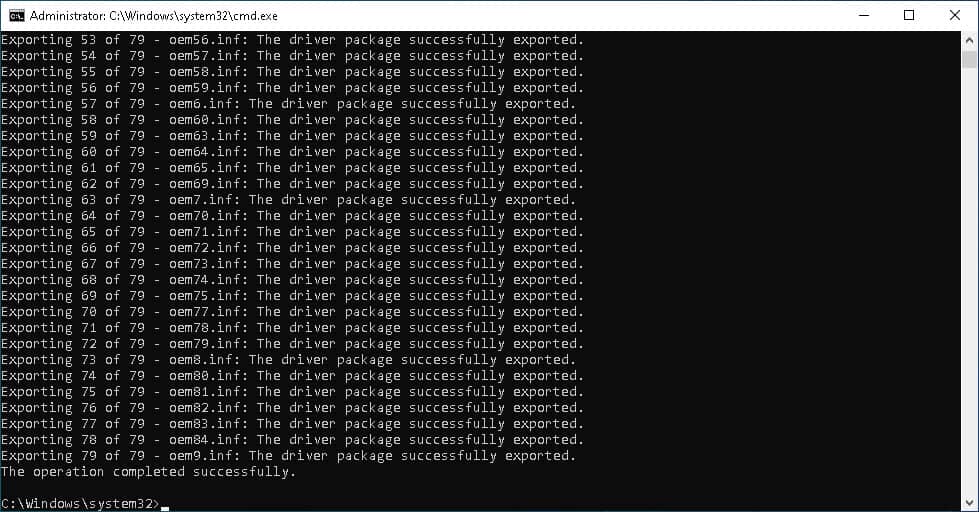
4. After pressing Enter, you will see the process of backing up your drivers to the desired folder. Wait a few minutes for DISM to complete the copy procedure. In the command prompt window, you can monitor the progress of the process and how many drivers are left to complete.

5. In a few minutes, you will receive a message at the end that the process of backing up your drivers is complete.
Drivers backup folder
Now close the command prompt window and open your backup driver’s folder. Depending on your configuration and drivers, the contents of the Drivers folder will be similar to the following picture.

As you can see from the above, DISM has easily and quickly copied all the important drivers to the previously created Drivers folder. Also, we didn’t use any fancy interface for this procedure as in third-party utilities. The only drawback of this procedure is that we cannot see exactly which driver (for which hardware) is copied to the Drivers folder.
We can’t learn much from the cryptographic names of subfolders in the Drivers folder. But if you enter any subfolder, you will find so-called INF files from which you can explain which driver it is. For example, from this example in the picture below, we see an NVIDIA graphics card driver. You can apply a similar procedure to other subfolders if you are interested in what the drivers in your folder are.

Restore drivers
Since we have successfully created the backup drivers, they need to be put back in place after reinstalling Windows. There are two ways to restore these drivers. The first is by installing the INF file using the context menu. Once you have identified which driver it is, click on the INF file and install it.

The second, faster way is to restore all backup drivers using one special command – PnPUtil. This tool is a handy Windows system tool that, in addition to restoring drivers, also serves to remove them. Of course, we use PnPUtil to get our drivers back where they need to be.
So, open a command prompt and type the following command: pnputil.exe /add-driver H:\Drivers\* .inf/ subdirs /install and press Enter.

(In my example, I chose drive H, and the driver backup folder is Drivers. Of course, you can change this as desired by following the instructions.) Wait for the procedure to complete, and PnPUtil will restore all your drivers without manually reinstalling from the Internet or DVD media.
Conclusion
Perhaps one of the most complex parts of installing Windows is installing all the drivers. The operating system will probably have plenty of generic drivers for your devices, but you always have to install new drivers manually. It’s always better to download and install the latest and recommended drivers for motherboard chipsets, sound, network, graphics, etc.
Reinstalling drivers can be quite an inconvenient and time-consuming process. So it’s not a bad idea to back up your drivers as described and go through Windows reinstalling with the least effort.
I recommend periodically backup your drivers even though you don’t intend to reinstall Windows. In case of disk failure, Windows boot problems, and the like, you may still have to reinstall the operating system.
I hope this text was helpful and if you have any questions or suggestions, leave a comment.