As You know, average CPU temp while gaming should be within certain operating limits to avoid overheating and unexpected functional problems. Problems can be BSOD (hated blue screen of death), “freezing” the entire system, sudden shutdown, or reset.
Whether it’s an undemanding office job, internet surfing, or gaming, monitoring your system’s temperature (temp) is imperative when working on a computer. The word system refers primarily to the processor’s temp (CPU) and graphics card (GPU). Both are the most significant heat generators in your desktop case or laptop.
In addition to these annoying events for every user, they can also lead to data loss or physical damage to the processor. With laptops, the situation is even worse due to the small space challenging to cool. To prevent overheating, we need to know the proper CPU temperature without and under full load. Several factors influence the answer as to which CPU temp is good or not.
Table of Contents
How to monitor CPU temp while gaming?
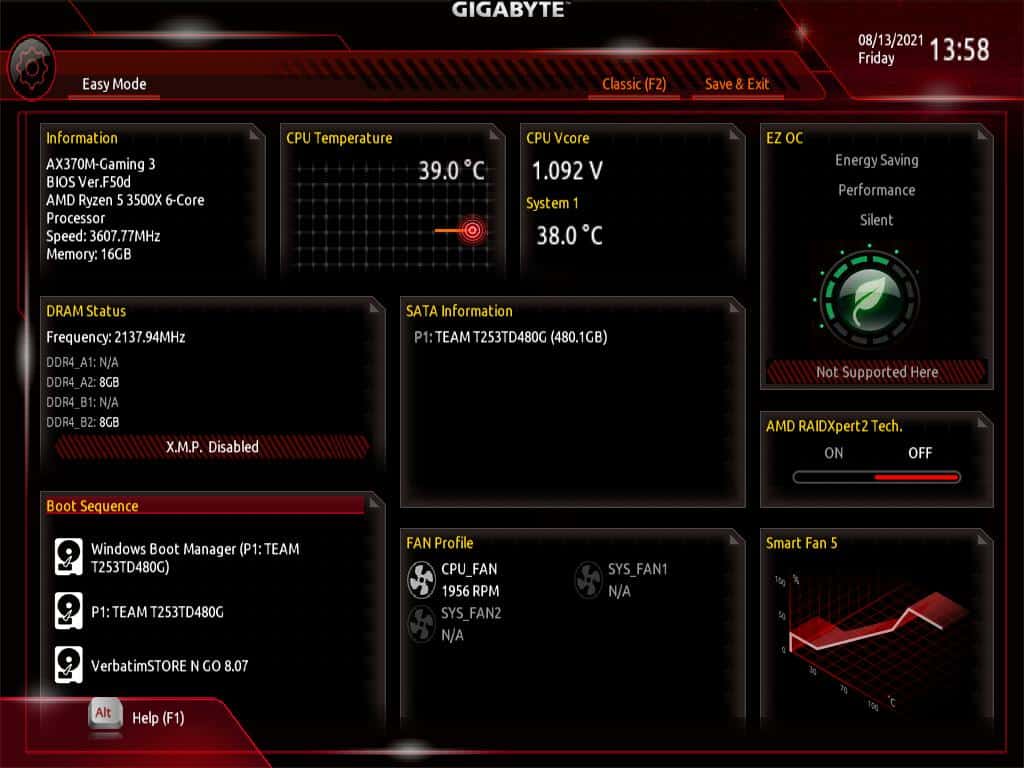
There are several ways to do this. The easiest way is to enter your computer’s BIOS before starting the operating system and look at the parameters. Depending on the model of your motherboard, in 90% of cases, the BIOS entry key is Del on the keyboard.
After pressing the Power button on the case, press the Del button (on the keyboard) quickly several times. You will be in the BIOS menu. Consult your motherboard manual if there’s another key combination to enter the BIOS. Usually, the main screen of the BIOS also has important parameters regarding voltage, CPU temp, fan speed, etc.
Since it’s inconvenient for most users to check the system parameters from the BIOS, there are good utilities that can do this directly from the operating system.
Core Temp
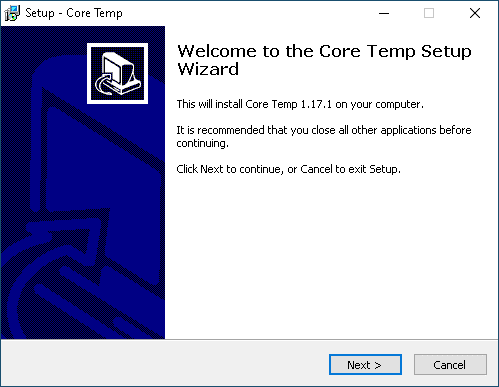
For this example, we will install a simple monitoring program, Core Temp.
1. Download Core Temp and run the installation:
2. Only check the first item to avoid installing unnecessary content:

3. At the end of the installation, you should get this program interface:

Core Temp is a simple CPU temp control program. It’s focused more on the CPU itself. You can learn everything necessary about CPU; its name, which cores it uses, and the temp of each core. An additional plus is that it also displays information about the max temp of the T-joint, denoted as Tj.Max for Intel CPU.
Let’s look at the temperature of this processor (in the picture above) at idle and what it tells us. Is this a suitable temperature or a bad one in idle? The answer to this question is the official website of our processor, where we can see the recommended and maximum temperatures for a particular model.
The maximum temperature for most processors is 90 to 105°C (194 to 221°F). We can describe these CPU temps as very bad, and we can’t allow them because problems like BSOD, resetting, or shutting down the computer start to happen.
What is a normal (good) CPU temp while gaming?
Based on the experience and recommendations of experts and the experience of computer users, some recommended CPU temp would be as follows:
- idle = 30 to 45°C (86 to 113°F)
- full load= 60 to 80°C (140 to 176°F)
For example, suppose you run a demanding game. In that case, you expect the processor to heat up more due to the amount of data it processes. But that temperature shouldn’t be above 80°C under the highest load for a long time. Avoiding such high temperatures is necessary because they reduce the processor’s life.
Temp over 80°C under full load points to some problems regarding adequate CPU cooling. Also, suppose the processor temperature suddenly jumps to 60°C or more under low load. In that case, it again indicates a severe problem that we must fix urgently.
Besides useful Core Temp, free utilities such as MSI Afterburner and FPS Monitor are also available if you want more advanced system monitoring. Those programs will show you the most crucial system parameters during the game session via the OSD menu.
MSI Afterburner
Afterburner is a top-rated program for users who want to monitor the most critical parameters of the system without leaving their favorite game. In addition to monitoring CPU temp and GPU temp, you can fine-tune the graphics card parameters for OC.
In the following example, we will install and configure MSI Afterburner to monitor critical system performance parameters without overclocking settings.
1. Download MSI Afterburner and run the install process:

2. Be sure to check RivaTuner Statistic because you will not be able to have OSD in games without this add-on:

3. After a few clicks on the Next button, installation is finished:

4. This is the main screen of MSI Afterburner; click on the Settings button:

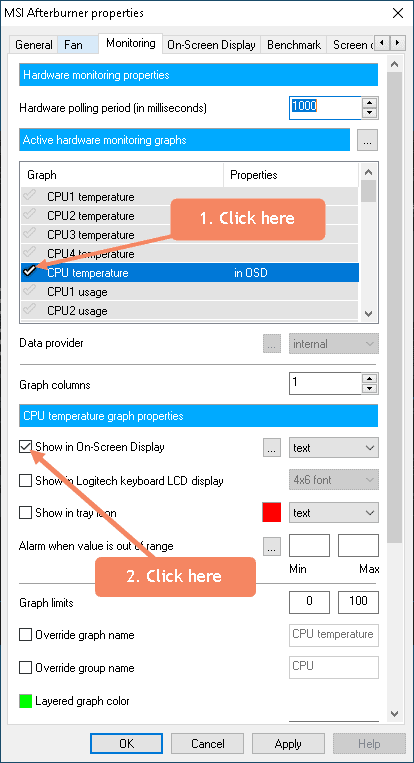
5. Click on the Monitoring tab:

6. Check parameters that you want to monitor (like CPU temp) and check to show in OSD:
7. This way, you can select all the parameters you want to monitor during the game:

8. You can choose a hotkey for OSD on the On-Screen Display tab, just like I decided for F12:

When you finish with the settings, click the OK button. Thus Aterburner is set to display CPU temp, GPU temp, and everything you choose to monitor during gaming. Don’t forget to leave MSI Afeturburner running in the background. Check the icon in the systray.
In my favorite FPS game, Doom Eternal, this looks like the following picture:

How to monitor GPU temp while gaming?
The high temperature doesn’t suit the graphics chip like the CPU. Based on the experience and recommendations, GPU temp would be as follows:
- idle = 35 to 50°C (95 to 122°F)
- full load= 60 to 80°C (140 to 176°F)
The tools we can use to monitor GPU temp are as follows:
- MSI Afterburner (free) – in-game OSD
- GPU-Z (free)
- FPS monitor (great monitoring program, but you must pay license) – in-game OSD
My recommendation for monitoring CPU and GPU temp while gaming goes to MSI Afterburner. It’s free, powerful, and easy to use.
Why do the CPU and GPU overheat?
Many reasons can cause your processor or graphics card to overheat:
- Poorly done cabling in the case that interferes with normal airflow.
- Too small a PC case for built-in solid components.
- The case doesn’t have an airflow fan, or there’s an insufficient number of fans.
- The heatsink on the processor isn’t correctly seated (attached).
- Thermal paste is of poor quality or has lost its properties over time.
- Accumulated dust on the fans prevents typical heat dissipation from the CPU and GPU.
- Excessive room temperature.
These are why the worst-case scenario of high temperatures in idle mode can happen to you.
Recommendation for normal (good) GPU and CPU temp while gaming
- Always try to keep the case in a place with a normal ambient temperature (20° to 25°C)
- Do quality cable management due to the better air circulation inside the case.
- Install at least one fan on the front of the case to suck in the fresh air and a second on the back to remove hot air from the system.
- Ensure the built-in heatsink matches your CPU heat dissipation (TDP) – install a stronger heatsink or water cooler if you want OC.
- Check the condition of the thermal paste. If necessary, replace it with a better one (this applies to both the CPU and the GPU).
- Periodically clean the case of dust. I recommend every two to three months if you use the computer intensively.
Look for an example of cable management in my guide, How to Build Gaming PC. The recommendation for thermal paste is Arctic MX 5, which is sufficiently affordable and efficient. It performed equally well for the CPU and the GPU.
Cleaning your computer
One of the more severe problems that cause overheating is any accumulated dust inside the case. Depending on the computer use, the cleaning time can be every two to three months, but it should not be a difficult job. Here’s how to make it as painless as possible:
- Disconnect all cables on the PC case and take them outside.
- A small compressor in the garage or workshop will do the job, but get a can of compressed air if you are not skilled in using a compressor.
- Open both sides of the PC case and remove all dust from the motherboard and fans (on the PC case, processor, and graphics card).
- Wipe the dust from the flat parts with a damp cloth that does not leave traces (microfiber cloth).
- Return the sides of the case.
Don’t be lazy and avoid this job. This procedure is a 10-minute long but can extend the life of your computer and prevent it from overheating.
Conclusion
I hope you understand how important it’s for your system to work long and reliably without the frustration of overheating. If you take just a little care of your computer, the problems can be minimal.
It’s enough to use some of the listed tools to monitor the system’s parameters during the gaming process, preventing possible problems. Even if they occur, it will be apparent where to locate them.
If you have any questions, don’t hesitate to write to me—happy gaming without GPU and CPU temp problems.